In this tutorial I’ll show you how to create a Monero Node on a Synology NAS using Docker. The benefit is not only giving back to the Monero community but also provides you with more privacy for your own transactions. Running a Monero node is quick, easy, and will run on just about anything.
Getting started with a Monero Node in Docker
Before we start there are a few things I’m going to assume you’ve already done, if not do them now.
- You already have a Monero wallet created.
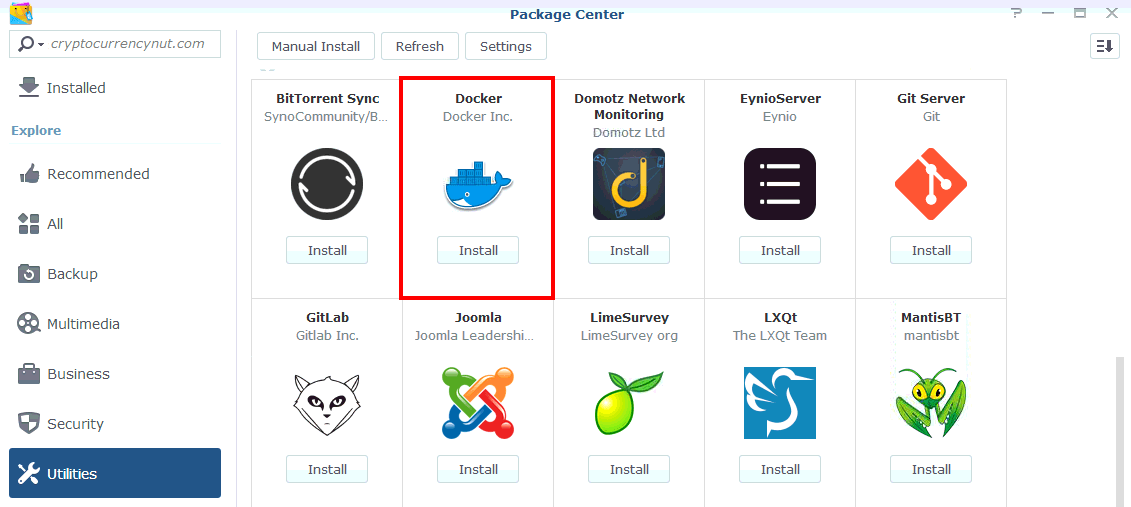
- You own a Synology NAS that that supports running Docker and already have the package installed. If not already installed go to: Package Center > Utilities > Docker and click Install.
Now lets get started!
Running a Monero node in Docker on a Synology NAS
- First, log into your Synology DSM and open the Docker package.
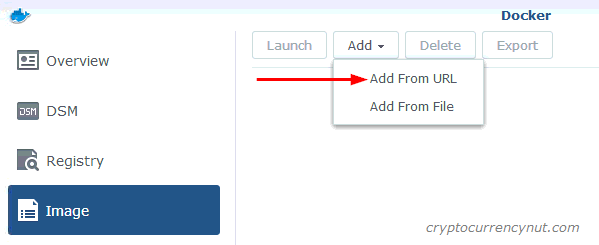
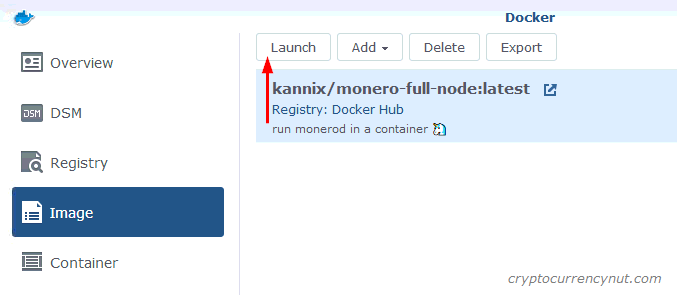
- On the left hand menu click on Image, then click on Add from URL from the Add drop down menu.
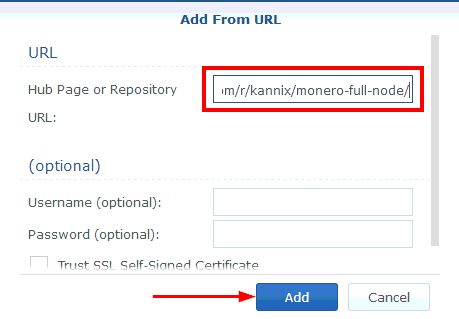
- Enter the following URL adddress, then click on Add: https://hub.docker.com/r/kannix/monero-full-node/
- Next select the Monero Full Node image and click on Launch.
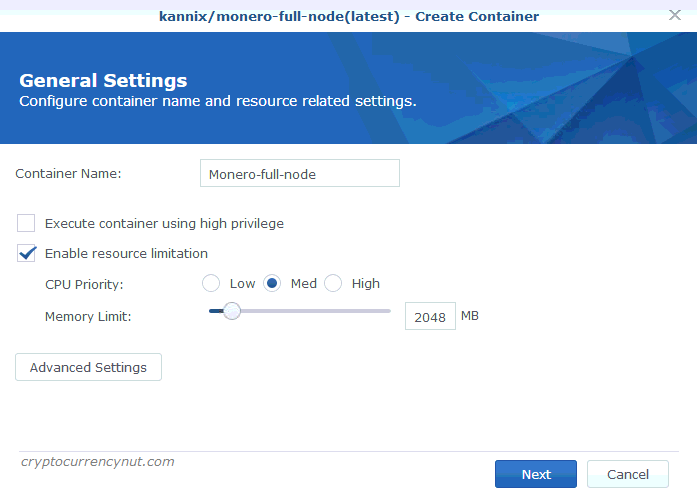
- Now give the container a name of your choice. I have also enabled resource limitation to Med CPU priority and 2GB of RAM. Then click on Advanced Settings.
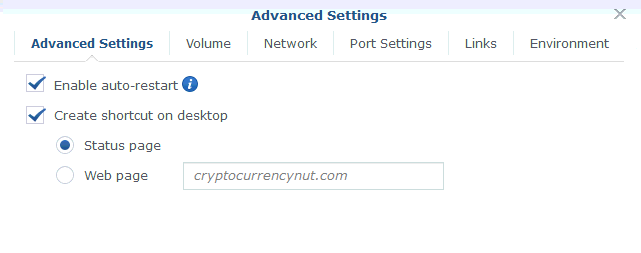
- From the Advanced Tab check “Enable auto-restart” and “Create shortcut on desktop”
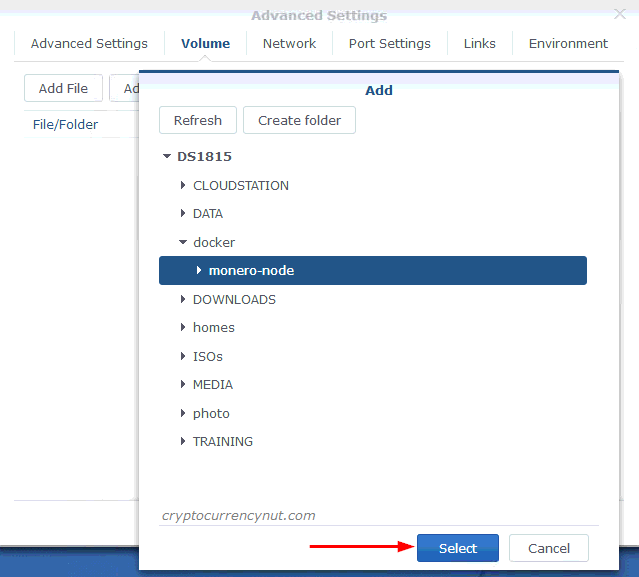
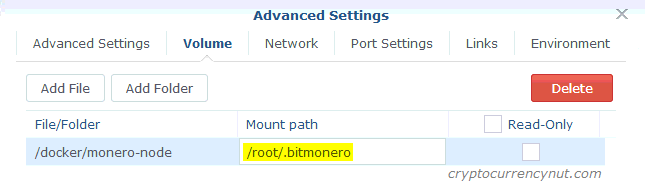
- Now click on the Volume tab, then Add Folder and select the folder you want the Monero node docker image to store the blockchain.
- Still on the Volume tab, under Mount Path type the following:
/root/.bitmonero
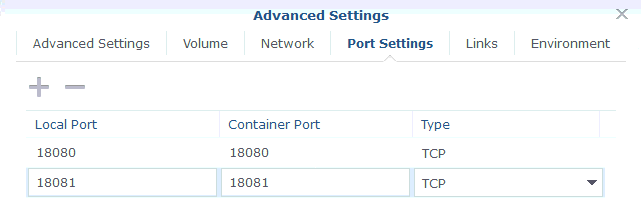
- Now go to the Port Settings tab and change the Local Port to match the corresponding Container Port, as shown below.
- Next go to the Environment tab and click on the + button to add a new variable. Type name for the variable name and for the value type monerod. Then click Apply.
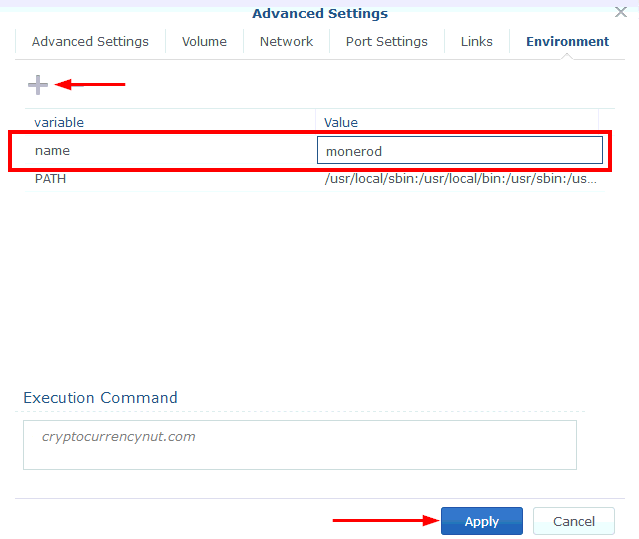
- Then click on Next, and then Apply.
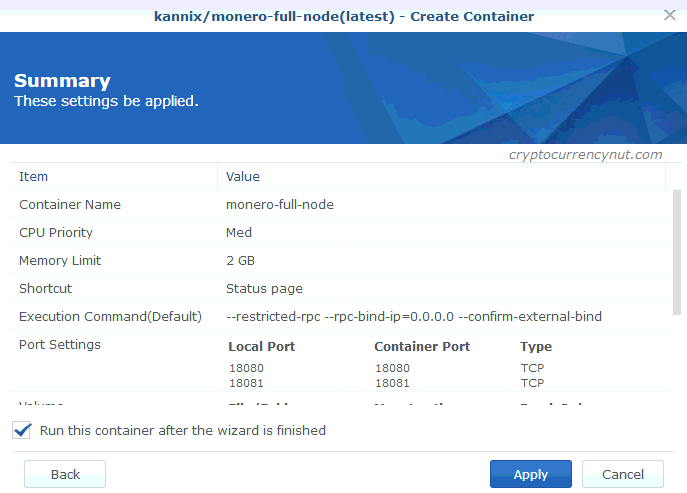
At this point your Monero Node is now up and running and should be downloading the blockchain now!
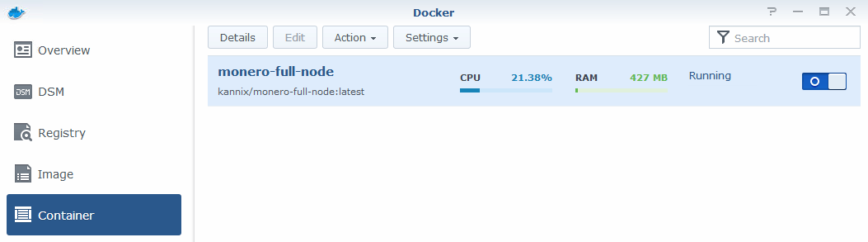
You can verify everything is working fine by going to the Container tab, viewing the Details and then Log entries. Below you can see my last entry shows 41599/1457410 
Notice: Downloading the blockchain can take several hours.
Configure your Monero Wallet to use the new node
Simply open your Monero Wallet and go to the Settings on the left hand menu. Then change the Daemon address to the IP address of your Synology NAS and click on Connect. 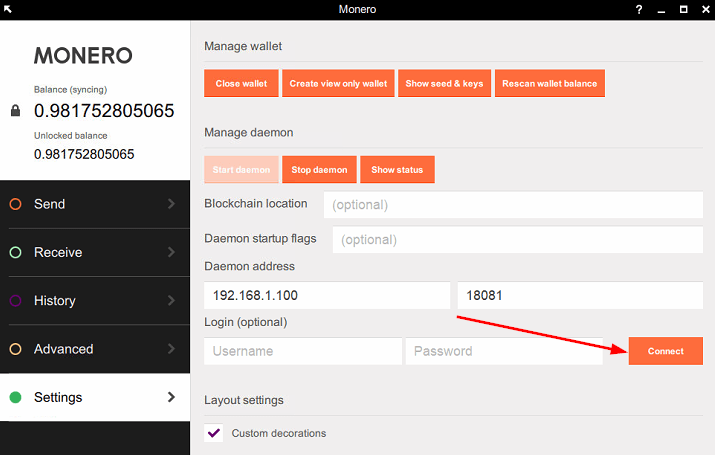
That’s it! You now have a full Monero Node running on your Synology NAS within Docker.

Do you have any advice on binding the rpc to the ip of the Nas?
I added –restricted-rpc –rpnc-bind-ip [local Nas ip] –confirm-external-bind
as execution commands in the environments tab when creating the container. But I keep running in to errors when starting the container.
It does run fine without these commands, but as I understand it, it would leave the node open to receiving commands from outside connections.
which cryptocurrency is good to invest
That’s all really based on personal opinion, but bitcoin and monero both have done well for me.
Thanks for taking the time to explain this! Much better solution than running node on my laptop. One small question – on my laptop, I was able to query in the terminal to establish if my node was up to date. I tried this on the docker terminal tab but it didn’t work. Is there an easy way to do this? Many thansk