So you have bought Ripple (XRP) and now looking for a place to store it? This guide will show you how to create a Ripple wallet using Toast Wallet on a Windows desktop. However, Toast Wallet is also available for Mac, Linux, iOS, and Android.
If you are looking for a way to buy Ripple, check out our How to buy Ripple guide!
Creating a Ripple Wallet using Toast
- First go to https://toastwallet.com/ and download the application for your operating system, in this case I’ll be using Windows 7+ Installer.

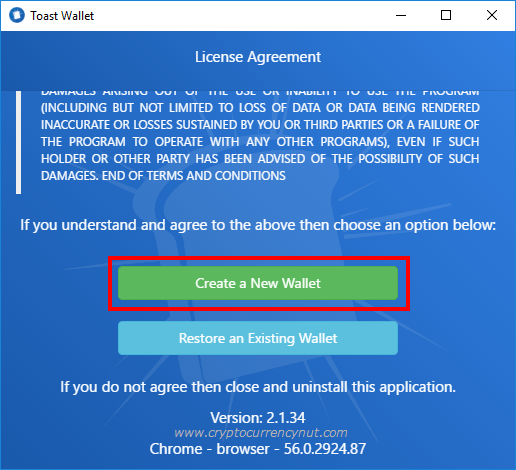
- Run the downloaded .EXE file and then scroll to the bottom of the application and click on Create a New Wallet.
- Now set a PIN for your wallet and confirm it.

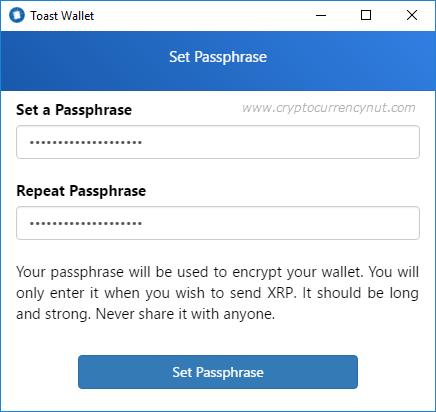
- Next set a passphrase and click on Set Passphrase.
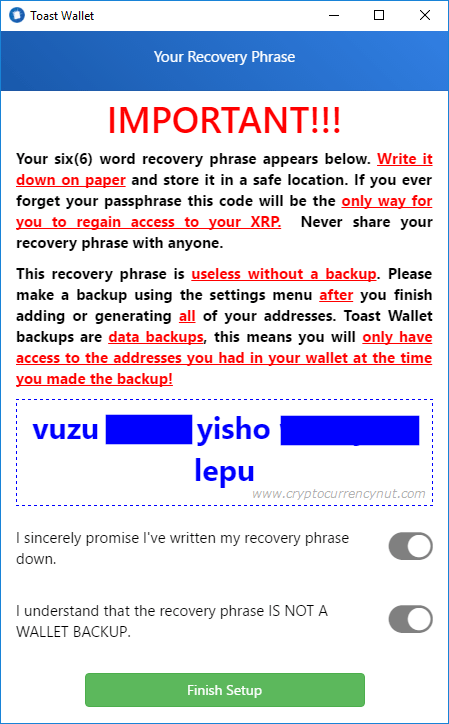
- Write down your six word recovery phrase, then click on each slider and then on Finish Setup.
- Toast wallet is certainly worthy of support. Determine how much you’d like to donate or none at all.

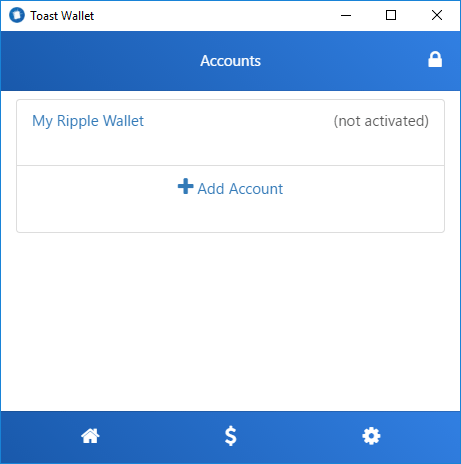
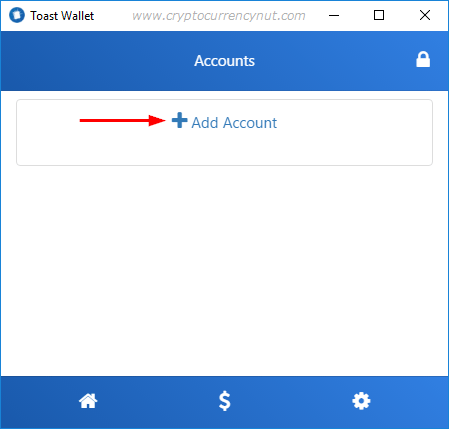
- Now click on Add Account.
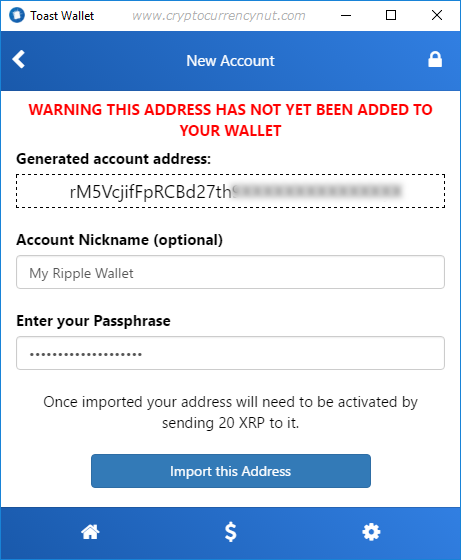
- Almost done. Click on Generate New Address.

- Give your account a name if you wish and enter your passphrase you set earlier and click on Import this Address.
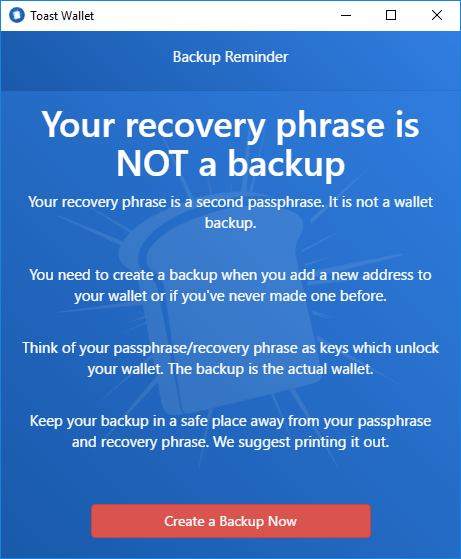
- Now click on Create a Backup.
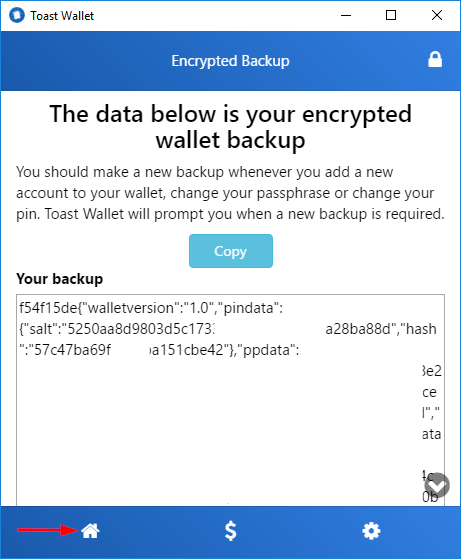
- Finally, copy the backup code, maybe print it out along with your 6 recovery words, or add it to your password manager! Then click on the Home icon.
You now have a Ripple wallet that is ready to accept your newly purchased Ripple (XRP)!
If you are looking for help buying Ripple be sure to read our guide here.
It is VERY important to keep your PIN, Passphrase, and a backup of your wallet in a secure place such as a password manager and/or printed off and stored in a home safe. In addition you will want to make sure the computer your using is not compromised with malware or keyloggers to steal this information.
For the most secure option, I recommend everyone to buy a hardware wallet such as the Ledger Nano S.