Hardware wallets have long been known to be one of the best places to store your cryptocurrencies, by storing your coins offline, and Trezor hardware wallets have been a leader in that market with the Trezor One wallet. The new Trezor Model T is the 2nd generation hardware wallet that offer the same high security but now with a number of new features and improved user experience and security.
Add more than 8 GPU in Windows 10
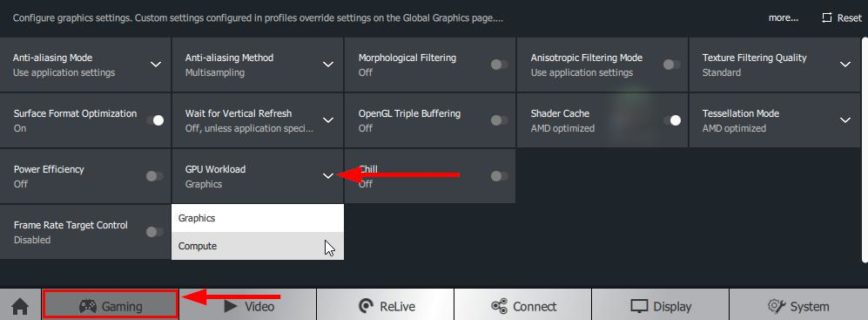
There still seems to be confusion about Windows 10 and not being able to add more than 8 GPU in Windows 10 from the same manufacturer. This limitation isn’t a Windows 10 issue, but instead a driver issue.
Since Crimson version 17.10.2 (release notes), AMD has added support for more than 8 AMD GPU’s in Windows 10.
In this short guide I’ll show you how to enable this feature so you too can run 12 AMD GPU’s on Windows.
Build a 12 GPU Mining Rig: Monero, Ethereum & Vertcoin
Building a 12 GPU mining rig doesn’t have to be expensive and in this guide I’ll be showing you how to build a flexible 12 GPU mining rig which can be used to mine Monero, Ethereum, Vertcoin and any other coins that can mined using Nvidia and AMD cards.
What do I mean by “flexible”? I mean while this guide will focus on building a 12 GPU mining rig, you don’t have to use 12 GPU’s to start! Depending on your comfortable initial investment you can start with as little as a single GPU mining rig and using the parts detailed below, then simply expand as your budget and profits allow.
Read more “Build a 12 GPU Mining Rig: Monero, Ethereum & Vertcoin”
Mining Monero with XMR-Stak on Windows
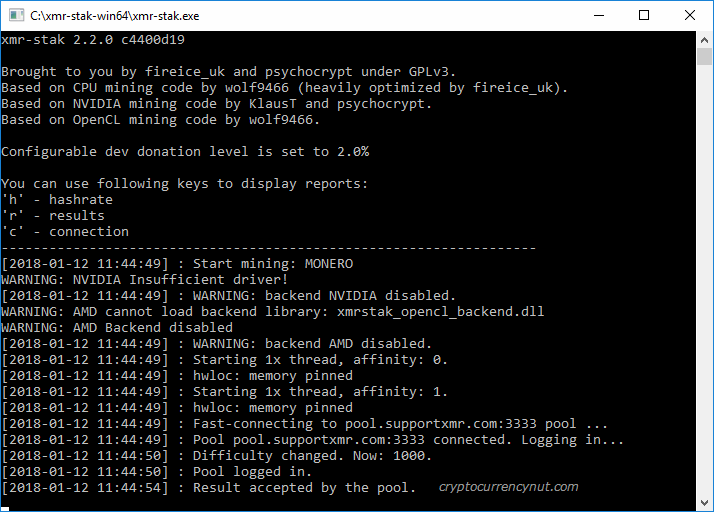
Mining Monero on Windows can be easily and quickly done using a single miner, XMR-Stak.
In addition to Monero, XMR-Stak can be used to mine Aeon, Electroneum, Intense, or Sumokoin cryptocurrency using CPU as well as AMD and NVIDIA graphic cards.
In this guide I’m going to assume you already have your Monero mining rig built with Windows already installed and are ready to start mining for Monero in 3 simple steps!
How to create a Ripple wallet
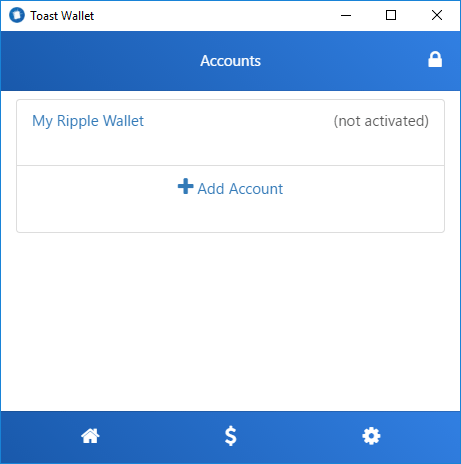
So you have bought Ripple (XRP) and now looking for a place to store it? This guide will show you how to create a Ripple wallet using Toast Wallet on a Windows desktop. However, Toast Wallet is also available for Mac, Linux, iOS, and Android.
If you are looking for a way to buy Ripple, check out our How to buy Ripple guide!
How to easily buy Ripple cryptocurrency
Ripple has been getting a lot of attention lately, which in turn has got a lot of people asking “How do I buy Ripple?” or wondering “Where to buy Ripple?“. Exchanges such as Kraken, Bitstamp, and most others are being inundated with new account requests. Which in turn its taking many weeks just to get your account verified.
In this guide I’ll show you how to buy Ripple (XRP) very easily and quickly, usually in less than 30 minutes!
How to run a Monero node on a Synology NAS
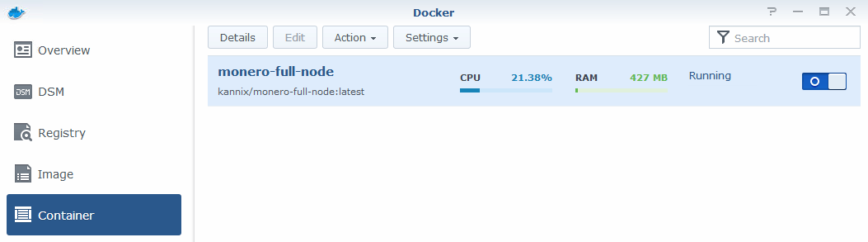
In this tutorial I’ll show you how to create a Monero Node on a Synology NAS using Docker. The benefit is not only giving back to the Monero community but also provides you with more privacy for your own transactions. Running a Monero node is quick, easy, and will run on just about anything.
Getting started with a Monero Node in Docker
Before we start there are a few things I’m going to assume you’ve already done, if not do them now.
- You already have a Monero wallet created.
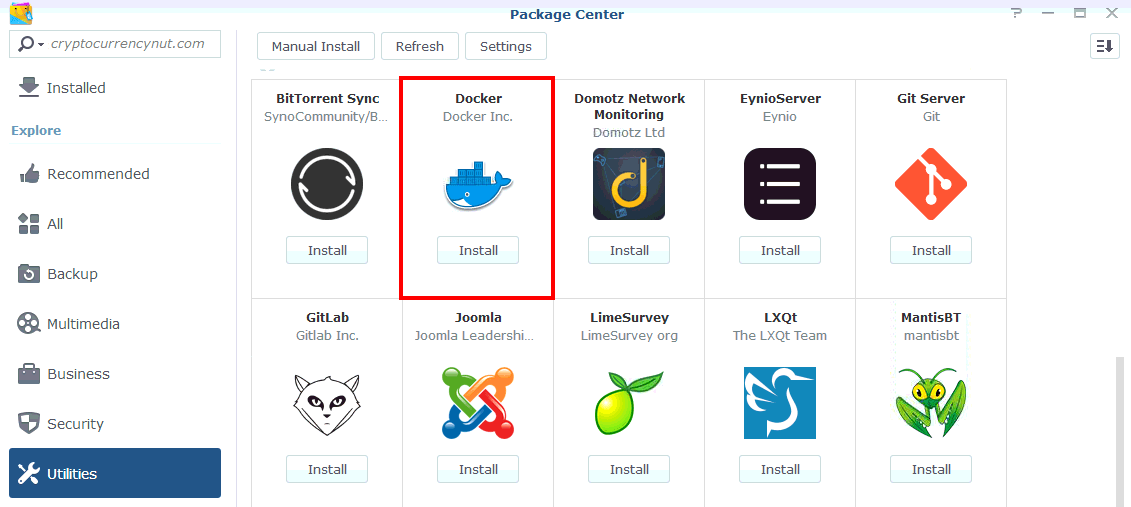
- You own a Synology NAS that that supports running Docker and already have the package installed. If not already installed go to: Package Center > Utilities > Docker and click Install.
Now lets get started!
How to create a Monero wallet
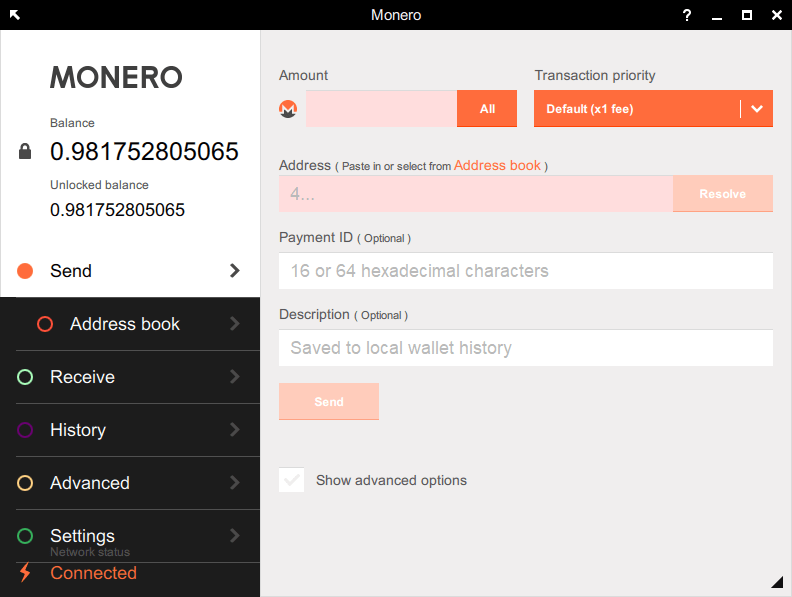
So you want to get started with Monero cryptocurrecy? Well the first thing you’re going to need is to get a Monero wallet and the best Monero wallet to use is the one available directly from Monero using with the GUI or command line.
In this beginners guide I’ll detail how to create a Monero Wallet using the Windows GUI, but the steps are essentially the same regardless if you are using Windows, Mac, or Linux.